Creating a driver team
In Breadstack Delivery, you can group your organization's drivers into teams, then assign each team to one or more stores.
 You must add drivers individually before grouping them into teams.
Why create a driver team?
You aren't required to organize your drivers into teams. However, there are several good reasons to do so.
- More efficient auto-assignment - If you use Breadstack Delivery's task auto-assignment function, any incoming tasks will be distributed among that store's team(s) as opposed to the general driver pool. This means a delivery task is more likely to land with a driver who knows the area.
- Better manual assignments - Even if you assign tasks manually, having teams allows you to make better decisions. You can easily see which drivers are best suited to serving a given region.
- Easier capacity planning - Teams allow you to quickly gauge how well-served your delivery zones are, so you can adjust capacity as needed.
There are two phases to setting up a team: 1) creating the team; and 2) assigning the team to a store.
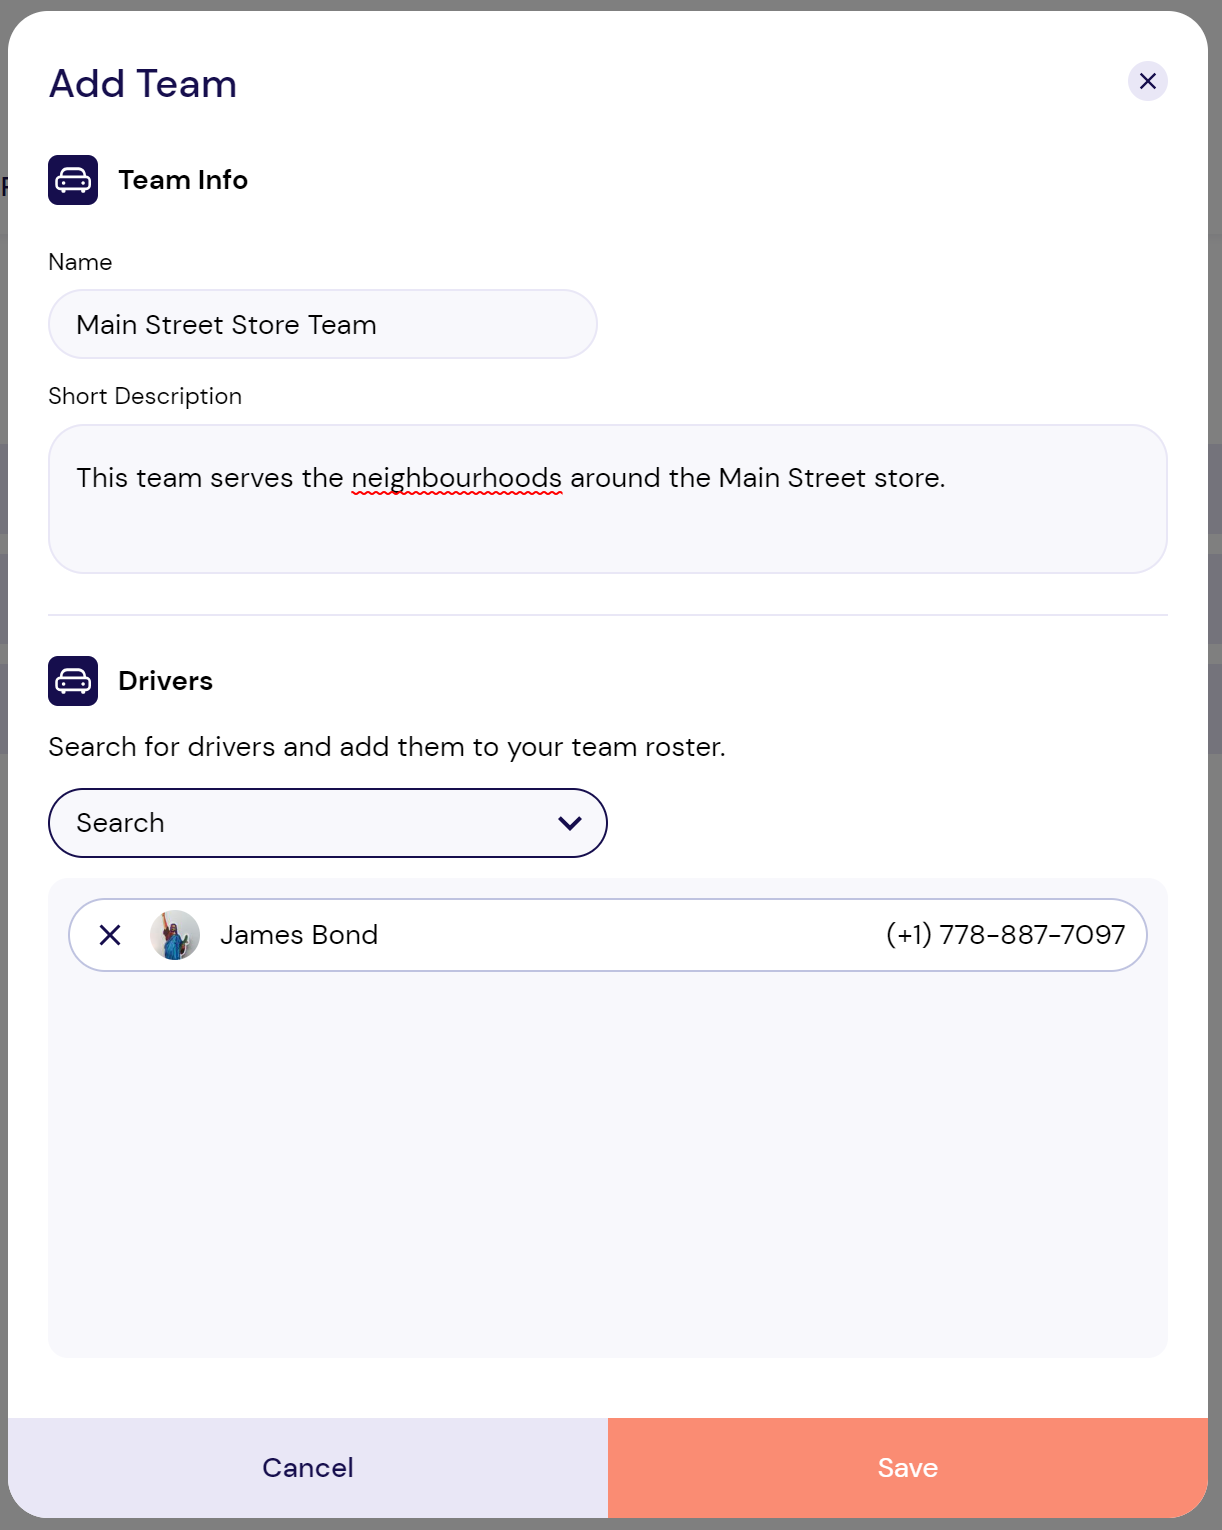
Step 1: Create your team
To create a new team:
- Go to Settings > Teams and select Add Team.
- Give your team a name and a short description that make it easy to recognize.
- Under Drivers, select the drivers you want to include in this team.
- Click Save when finished.
.
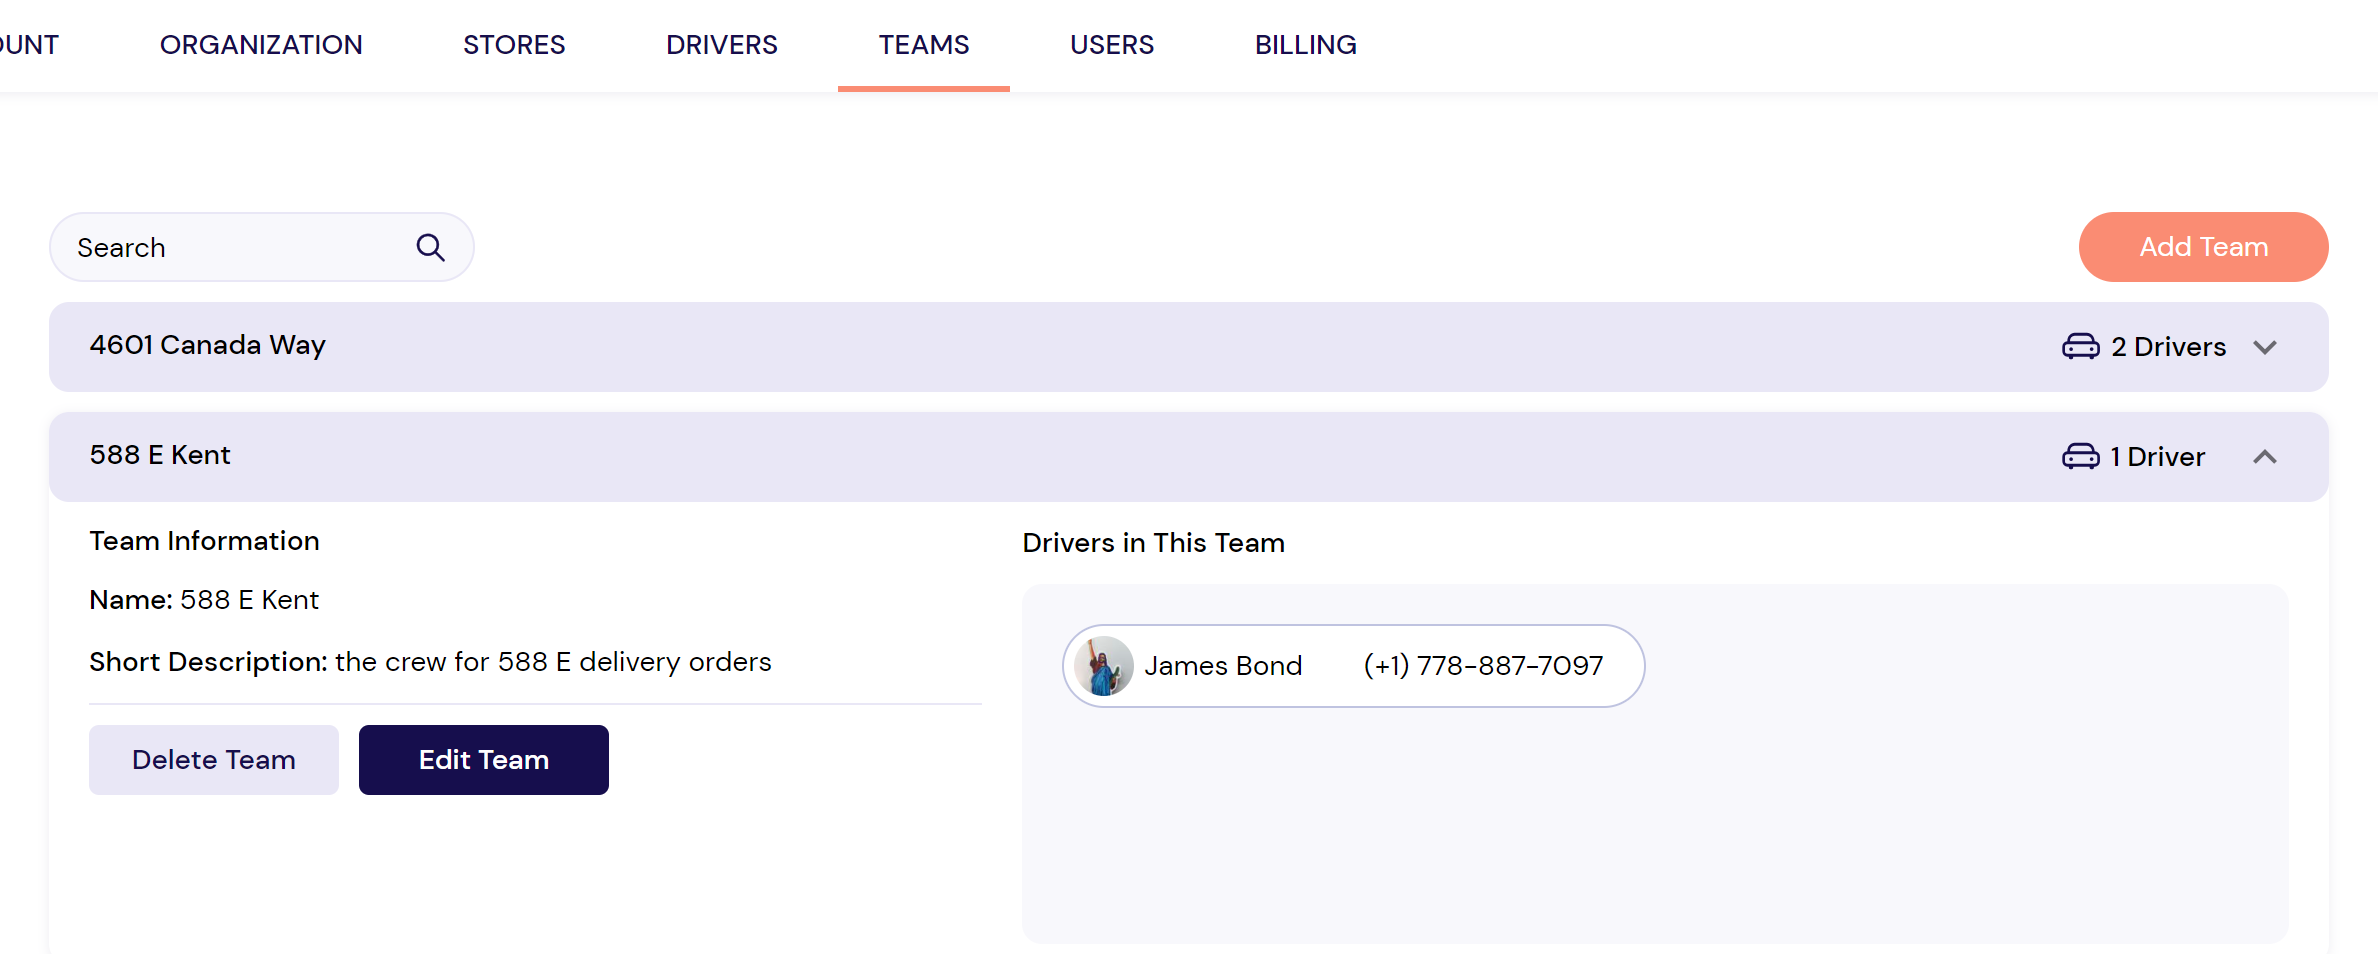
Your team will now appear listed in Settings > Teams. Click on any team in the list to view and edit it.
Step 2: Assign your team to a store
Once you've created a team, you can assign it to handle a particular store's delivery tasks.
- Go to Settings > Stores and click on a store to open its information panel.
- Select the Teams tab.
- In the dropdown, choose the team you want to assign.
Note that if you're assigning more than one team, you can choose which team takes priority for task auto-assignment by selecting Set to preferred.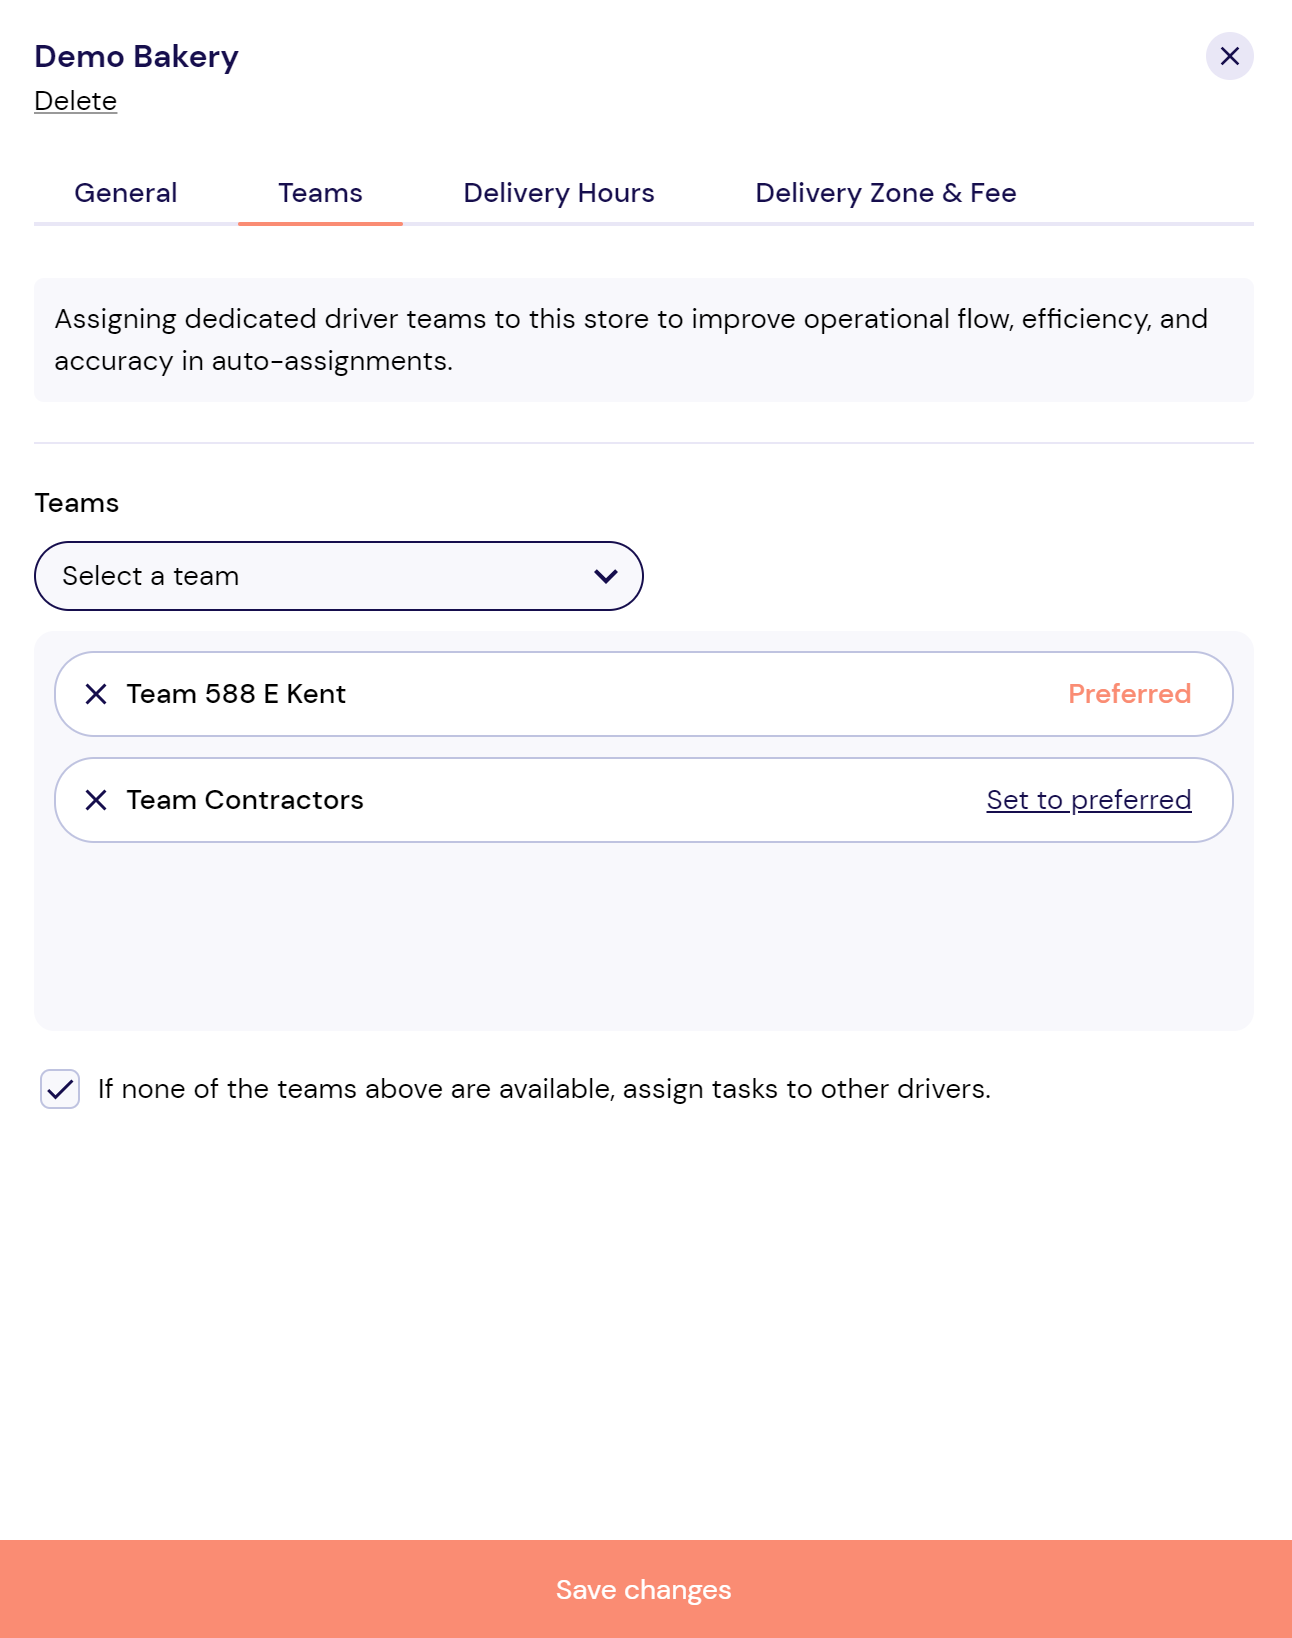
Related Articles
Adding a driver
Before you can start managing delivery tasks in Breadstack Delivery, you'll need to add at least one driver. Here's how to generate an SMS invitation that will prompt your driver to download the CanFleet Driver App. Once they've completed setup, you ...Updating a driver's profile
Managing drivers includes making sure you have accurate contact information and up-to-date details on their vehicle and license. Only users with admin access can edit drivers' profiles. To update your driver's information: Go to Settings > Drivers ...Adding specific drivers to an assigned stores location
As an Admin/Owner, you might want to designate a specific group of drivers to handle tasks from an assigned store and you can do so with the Auto-assignment feature of Breadstack Delivery. By utilizing Auto-assignment to match with your preference of ...Assigning a task to a driver
Assigning a task to a driver is a critical step in ensuring that it's fulfilled. This article will explain how to manually assign a task from either the Live Tracking screen or the Task List screen. If you'd prefer to automate task assignment, turn ...Tracking tasks and drivers on the live map
Breadstack Delivery's live map gives you a real-time, bird's-eye view of your delivery landscape. Use the map to keep track of your drivers - for example, to check if they are nearing a destination, stuck in traffic, or off course. Or, use it to see ...